Showing posts with label Gardening. Show all posts

Tuesday, August 23, 2011

Prevalent Potatoes

By: Keelin Purcell, Manager of School and Farm Programs
In preparation for a new Lippitt Farm Walk and Talk program, my intern Jenna and I did a lot of research on farms in 1845. One of the topics that I explored was the history and use of the potato (Solanum tubersoum).
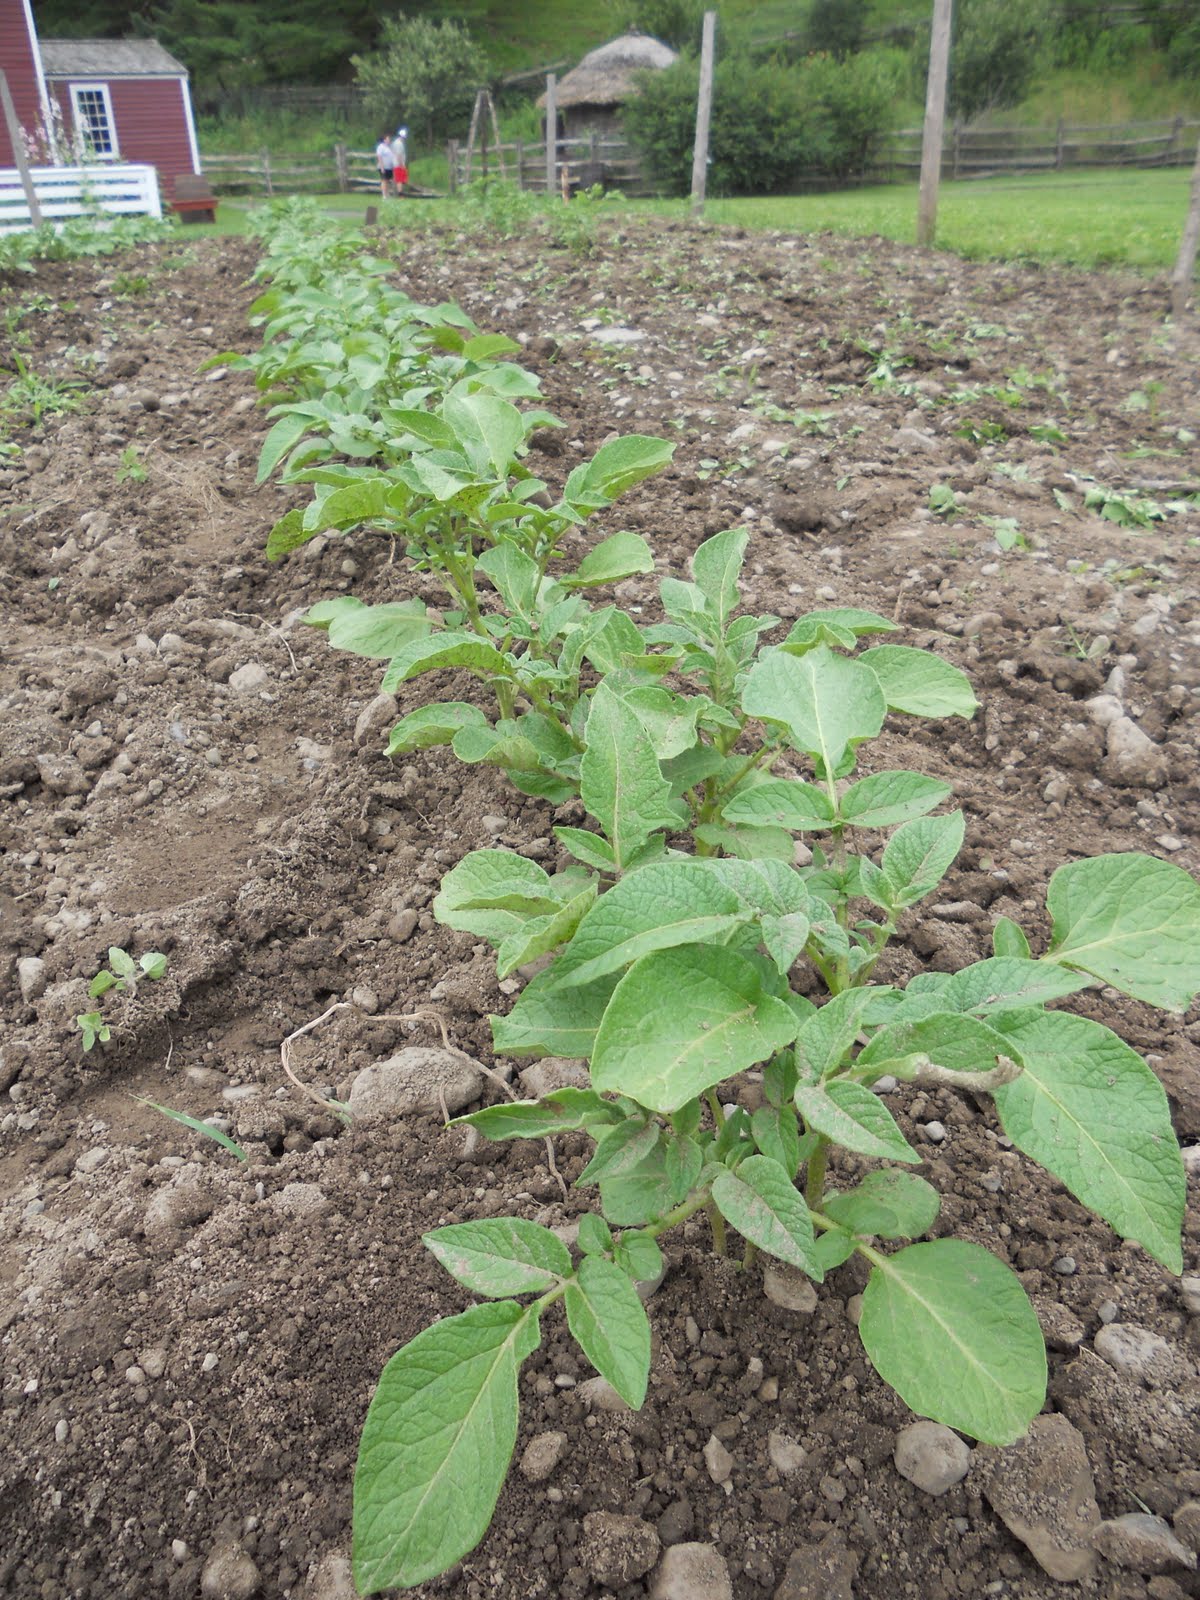
Our potatoes growing in early July.
Potatoes are fascinating in that they are so prevalent in our culture’s food, and yet many people do not recognize the growing plant. Make sure to visit to see and touch the plants growing in our Interpretive Field Garden across from the Lippitt House. Another interesting thing about potatoes is while they are referred to as a root vegetable, they are actually tubers, which are enlarged underground stems. So when we eat potatoes, we are eating stems! In contrast, a sweet potato (Ipomoea batatas) is a true root, as are carrots, beets, and parsnips. 
Our potatoes growing in early August.
Potatoes were very important in 1800s agriculture. They supplanted many other root crops, in part because they can be easily propagated asexually by cutting up (eyeing) and planting the previous year’s potatoes. An acre of potatoes also produces four times more dietary calories than an acre of grain.

Because potatoes do not grow true to type, they were almost always propagated asexually. However, by growing them to seed, many different varieties were produced. In 1845, there was a large selection of potato varieties to choose from, though most families grew one or two types. Potato epidemics were fairly common, because all the potatoes of a given type were clones and therefore very susceptible to contracting the same disease.
Potato choices from a 1881 seed catalog in the collection of the NYSHA Research Library.
Potatoes are harvested once the tops die back and would have been dried before going into the root cellar. Potatoes were steamed, mashed, boiled, fried, and roasted, as well as made into flour and starch.
This year we are growing Green Mountain, Red Natural, and Kennebec potatoes in our Interpretive Field Garden, as well as Fingerlings in the Kitchen Garden. I enjoyed the chance to learn more about the history of potatoes, and I am looking forward to seeing this year’s crop. My sources included Judith Sumner’s American Household Botany: A History of Useful Plants 1620-1900, Charles Bosson’s Observations on the Potatoe, and a Remedy for the Potato Plague, and U.P. Hendrick’s A History of Agriculture in the State of New York.

Sunday, August 7, 2011

Lippitt Farm Walk and Talk Lessons

by: Jenna Peterson, School and Farm Programs Intern
Part of my internship this summer has been gathering information on different agricultural topics, and using it to write interpretive lessons to be delivered by our farm staff. The farmers do an amazing job of talking about a variety of farm subjects, and I was able to provide them with more primary source material to work with, including census data, journal articles, and seed catalogs all from the middle of the 19th Century.

One of the reasons to have a goose on the farm is to collect their down feathers for use in pillows. 
There are four different talks that can be given based on these lessons; corn, poultry, crops, and the interpretive field garden. The corn talk focuses on changes in technology and farming practices, and how that impacted corn growers in the 1840’s and today. While I don’t think I was assigned to research corn because I am originally from Iowa, it probably didn’t hurt! The poultry talk focuses on the different varieties of poultry farmers would have had, including chickens, ducks, geese, turkeys, and even pigeons. We have everything but the pigeons here at the museum, so it is a great chance to see how they would have been raised. For the crop talk, the focus is more on the unexpected crops farmers grew alongside those we think of today. This means looking at things like buckwheat, barley, hops, tobacco, and my personal favorite, mangel wurzels. Be sure to check out this post from Farmer Marianne about mangel wurzels if you are interested in learning more!

Mangel wurzels, a type of beet, were commonly used as animal feed.
The final talk is not actually given by our farmers, but is instead led by myself or my supervisor. We take visitors through the interpretive field garden planted in front of the Lippitt House, and discuss the history of these field crops, as well as the different parts of plants that we eat. Did you know potatoes aren’t actually the root of the plant? Come listen to our talk and I’ll tell you all about it!

Corn was planted in a checkerboard fashion with squash and beans, modeled after the Native American Three Sister's Gardens.
These talks will take place at 2:00pm every day through Labor Day. They leave from the steps of the Hop House, and are open to all visitors. If you happen to be near the museum, stop by and learn more about farming in 1845. 

Tuesday, April 26, 2011

Bees and Hops

By: Kajsa Sabatke, Manager of Public Programs

Last week I watched a screening of Vanishing of the Bees hosted by The Farmers’ Museum and Otsego 2000 as part of our Food and Farm Film Series. The documentary explores Colony Collapse Disorder and the effort to discover why entire hives honeybees are vanishing. (If you’d like to learn more about CCD and Vanishing of the Bees, check out their website: www.vanishingbees.com.) The film series has been one of my favorite programs this year, because it has brought together new and experienced farmers, gardeners, and beekeepers, as well as people who want to know more about their food and how they can support local and sustainable agriculture.

If you’d like to learn more about farming and gardening, you can join us for our new Saturday workday programs at the museum. Once each month from April through September, you can learn about a component of our farm and gardens and then help our farmers with a project at the Lippitt Farmstead or one of our historic village’s gardens.

This Saturday, April 30, from 9am-1pm, you can join us as we install hop poles and prepare the hop field for the season. The farmers will begin with a 45-minute talk on growing hops, followed by a work session and time for questions. Pre-registration for these programs is not required, but you must be 18 years or older. Please come in work clothes and meet up at the museum’s entrance outside the Main Barn at 9am. If you’re not able to make the first workday of the season but would like to receive emails related to the workdays, please email stayconnected@nysha.org.

Hope to see you on Saturday!

Friday, April 30, 2010

Seeds, Seeds, Seeds!

By: Gwen Miner, Supervisor of Domestic Arts
Heirloom Seeds have been occupying some part of all my work days for the last twelve weeks, from ordering them to packaging them to now actually planting them in the hot frames.

For those of you who read my previous post in February, you will wonder if I found a seed variety that I was looking for. The answer is yes: thanks to the internet and our seed supplier, I was able to purchase the elusive Boston Marrow Squash seed. It was pricey, but it will be worth it when we harvest and finally get to cook some. Boston Marrow is a winter squash that matures in 90-100 days, weighing between 10 to 20 pounds and if kept cool and dry it will last until the following spring. The squash has been prized historically for its rich deep orange flesh with a fine texture. The Boston Marrow Squash has two hundred years of documented history. The following are two of the common stories regarding the origin of the squash. The first one is that the seed was probably brought from South America by an American sea captain in the early 19th century. The other is that it originated in upstate New York and was seed that the Native Americans gave to the European Settlers. Either way, it was introduced in 1831 to the public from Salem, Massachusetts as the Boston or “Autumnal” Marrow Squash.

For the past 6 weeks we have been packing seeds to sell in Todd’s General Store here at the museum and for the 4-H Heirloom Seed Project that we have sponsored for the past twenty plus years. We buy the seed in bulk and then pack them in envelopes that are printed in the Middlefield Printing Office using a design that is found on early hand-folded Shaker seed packets.
We offer for sale 36 different Heirloom Vegetable varieties, 8 different Herbs and 14 different Heirloom Flowers. If you are interested in purchasing seeds, stop in the store or email Josh at j.harley[at]nysha.org.
In addition to packing we just finished setting up two hot frames. At the Lippitt Farmhouse my co-worker Patrick MacGregor and I set up the frame last week and I planted it with our tomatoes, cabbage and melons on Tuesday, April 13.
In addition to that hot frame, Patrick built a new and improved one that we installed in the work yard at Bump Tavern to start five different varieties of Heirloom Tomatoes in peat pots for our annual Heritage Plant Sale on Memorial Day weekend.
We are beginning to plow up the field garden and beginning to work up the kitchen garden to ready them for planting. We will be planting some potatoes in the next couple of weeks, but will be waiting until the middle to last of May to plant seeds of most of the varieties of heirloom vegetable varieties that we grow. Hopefully, we will have a good growing season this year.

Friday, February 19, 2010

Fun Found in the Library

By: Gwen Miner, Supervisor of Domestic Arts
Last week I had a mission, a mission to locate some new images for our 4-H Heirloom Seed Project Exhibition Catalog. The old catalog was tired and in need of some revamping. Revamping means new images and new varieties. New varieties mean searching the seed catalogs; new images mean searching books and our special collections archives in the New York State Historical Association’s Library.

Over I went with flash drive in hand, ready to scan some fresh new images. Here is what I found:

A seed catalog from Fly Creek, which is 5 miles from here.

And the most fun find: a garden of vegetable people.

The vegetable people are trade cards that advertised seed and manures for the garden.

Tuesday, February 9, 2010

Looking for Seeds

By: Gwen Miner, Supervisor of Domestic Arts
Like many of you who garden, I can’t wait for the new seed catalogs to arrive. I love looking through them and finding the old familiar and favorite varieties, but also looking for new varieties. I especially like the colorful pictures and the old graphics that some of the catalogs use. It is a good day when I can locate the seeds for a variety that I once grew, but have been unable to get the seed of for some time. Such was the case yesterday when I located sources for seed for two vegetable varieties that I have not been able to find for several years. Thank you to the powers of the internet. Today I find out if they actually have the seed in stock.

You might wonder why I have not been able to locate certain seed stock. Well, that is because for our gardens here at the museum and for the Heirloom Seed Project I need heirloom varieties of seed that were grown preferably prior to 1850 in this area of New York. Weather, pests and disease affect the availability of seed stock from year to year, especially heirloom varieties.

We (museum staff) first started growing heirloom varieties back in the early 1980s when The Heirloom Vegetable Garden, a Cornell Cooperative Extension Information Bulletin, was published. We began growing, harvesting and cooking the vegetables that folks would have in the 19th century.


At the same time I put together the 4-H Heirloom Seed Project in conjunction with our Otsego County 4-H office. The goals were simple: to get kids growing heirloom varieties and gaining some knowledge regarding their importance and to have a vegetable exhibition component for our annual Harvest Festival held in September. That program has grown to include The Three Sisters Garden, Cloverbud Pumpkin and Sunflower, Heirloom Herb Garden and the Heirloom Flower Garden. This year we are planning to open an adult component.

For the last couple of weeks I have been perusing the seed catalogs, making out orders and sourcing out seeds. Patrick MacGregor, Meg Preston and I have also been revising and refreshing the exhibition catalog, a major project as it will have a new format, new graphics to go along with the offering of new varieties.

Check back to see how I make out actually acquiring those elusive seeds and on plans for the gardens here at the museum

Tuesday, December 8, 2009

Putting Down the Winter Vegetables

By: Gwen Miner, Supervisor of Domestic Arts
A productive kitchen garden in the 19th century would provide a family with a succession of vegetables to eat each season. The technologies available to families for storing or preserving vegetables for the long winter and spring were limited to “putting down” or cellaring, drying and pickling. Root vegetables, cabbages and apples were put down. Beans, corn, peas and pumpkins were dried. Cucumbers and cabbage were pickled in stoneware jars.
Most homes in the 19th century had cellars under the house for preserving vegetables. Climate-wise cellars were cool and moist, the ideal environment for cabbage, apples and most root crops. For those who did not have large enough cellars (or no cellar at all), certain vegetables were overwintered in the garden in straw lined trenches or hills that were covered over with more straw and soil.
Directions for harvesting the winter vegetables remain much the same today. Prior to the first hard frosts, root vegetables should be pulled out of the ground and the tops cut off. The root vegetables should be laid out so the outer skin dries and excess dirt can easily be brushed off. Cabbages pulled up by the root should be set head down so that any excess moisture can drain out and wrapper leaves removed.
When the vegetables are dry enough they are carried to the cellar for winter storage. In the Lippitt Farmhouse cellar we use large footed wooden bins with wire tops to store our root crops, barrels for apples and we hang the cabbages by their roots.
The productive root cellar is one that is well tended. It’s important to cook the soft vegetables, throw away the rotten ones and keep rodents away.
For more specific information on storing vegetables contact your local cooperative extension. They have excellent resources.

Tuesday, November 17, 2009

Harvesting Root Vegetables

By: Gwen Miner, Supervisor of Domestic ArtsAbout a week ago we harvested what did grow in the Kitchen Garden at the Lippitt Farmhouse. The majority of the vegetables we grow are root crops such as potatoes, carrots, beets, turnips and rutabaga. Along with the root crops, cabbage, onions, beans and peas were also grown and stored for the long winter months.
Root crops were the primary vegetable foodstuffs grown for much of the 19th century due to the available technology for the long term preservation of foodstuffs. A permanent method of freezing was not available and home canning did not become a common method of food preservation until the latter part of the 19th century. What couldn’t be put down in the cellar was “put up,” hung up to dry. All you would have needed was the correct environment and the “know how” for the successful storage of most of the vegetables grown in the 19th century.
Harvesting this year was easy. I hate to say it, but it only took a few hours to bring all the vegetables in. It was not a good growing year. The vegetable yield this year was only a fraction of what we normally grow in a good year. The vegetables overall were in good condition but in size they were small to the occasional large.
We pull our root crops out of the garden and cut off the tops, leaving two inches or so of stem. The roots are then laid out to dry for a few days in the wood shed or on the barn floor to toughen up the skin and remove any clinging soil before taking them to the cellar.
After they’ve dried, the vegetables are then sorted according to size. Why, you might ask? Small vegetables do not have keeping qualities that the large do. The rule is, use the small and damaged vegetables first because they do not keep. As the saying goes, “one bad apple spoils the whole bunch.” Once sorted, they are carried to the cellar and stored in bins for use during the winter.
For more on “cellaring” or winter storage, check out my next blog post.

Tuesday, September 22, 2009

Vegetables, Vegetables, Not So Many Vegetables

By: Gwen Miner, Supervisor of Domestic Arts The rainy cold weather this summer is a part of any conversation that I have had this summer when it has come to gardens in general and our Kitchen Garden here at the museum. The five beds in Lippit Garden Our Kitchen Garden at the Lippitt Farmhouse is laid out as a garden would have been for much of the nineteenth century: geometrically in beds. The garden consists of five beds. Three of the five as of this writing are slowly growing. Two, because they were either under water or wet most of the summer were a lost cause by July. At this point we are harvesting potatoes, turnips and early cabbage for use, but is looking like we won’t have much to “put down“ in the cellar for winter use. For the most part though, the development of the vegetables is where they would be the end of July or early August even though it’s already mid-September. A bed with growing plants. A bed that is too wet. Small turnips Lessons from this cold, wet summer:
  • Obviously, one cannot control the weather.
  • I am glad I do not live in the mid-nineteenth century and am not dependent on the foodstuffs I grow.
  • Location, Location, Location or “Situation” as the garden manuals of the nineteenth century stated is of the most important consideration. Never site a garden at the foot of a hill…
The days are getting shorter and the nights colder, so I am not sure if things will grow much more, but I do have to start thinking about harvesting what we do have. Stayed tuned for storage or “cellaring” of your winter vegetables.

Thursday, June 18, 2009

Heritage Plant Sale Celebrates 15th Anniversary

By: Kajsa Sabatke, Interpretive Projects Coordinator
2009 marks the fifteenth year that Supervisor of Pharmacy and Historic Gardens, Patrick MacGregor, has run the Heritage Plant Sale on Memorial Day weekend at the museum. Patrick’s sale has been successful because when people buy their new plants, they take home a piece of the museum and its gardens. He is often approached by visitors who report back on plants they bought as many as ten years ago. To supply plants for the sale, Patrick takes propagated cuttings from the museum’s heritage gardens and grows them offsite in other production gardens. He collects pots from museum staff, members, and other sale supporters and he pots all the plants prior to the sale.
The plant sale has developed some die-hard fans. Three years ago, Patrick had just sold his last Trillium – a historic and rare plant - when a woman came to look for one. She was from New Hampshire, staying with a friend in Hamilton, so Patrick dug up more plants that evening and the woman returned the next day to pick them up. The same woman returned last year, but Patrick had no Trillium available that year; this year, she called in May to ask about it. Patrick had a bumper crop of Trillium this year and the woman drove from New Hampshire and picked up her order bright and early on Saturday!
The plant sale was another success this year, thanks to the dedication of Patrick, his customers, and other museum staff. If you want to learn more about the Heritage Plant Sale or the heritage gardens, you can stop by Thrall Pharmacy at the museum.

Tuesday, June 2, 2009

Hot Frames

By: Gwen Miner, Supervisor of Domestic Arts
Do you have access to fresh horse manure? Do you have some lumber and a window sash? If you do, you can build yourself a hot frame to start your garden plants or extend your growing season. Hot frames have been used for a couple of centuries at least by gardeners to start plants for their gardens. The advantage of these frames is that they give you an additional 4-6 weeks growing time. All you need is a nice steaming pile—several wheelbarrow loads—of horse manure with bedding material mixed in (not sawdust, it makes the soil too harsh), some lumber to make a frame and a window sash to cover the frame with. The rule of thumb in building the frame is to make the back 2 times higher than the front and large enough to fit your window sash. The front of the frame is slanted to admit more light and to shed rain. Patrick MacGregor, Supervisor of Pharmacy and Historic Gardens and I set up one of the two hot frames at the Lippitt Farmstead the first week in April. Here is a step by step in pictures to help you set up your own hot frame. First, we selected the site and piled the horse manure to make a base for the hot frame. Second, we put the frame together on top of the horse manure facing southeast. Third, we began to fill the frame with manure, firmly stomping the manure every 6” until it was about 8” from the top of the frame. Fourth, we covered with 6” of soil composted from last years’ frames, and then put the window sash on. Finally, we let the frame set for several days as the manure heated up to 125 degrees. If you plant your seeds right after creating your frame, the temperature will be too hot and you will scald your plants. When the temperature dropped to 85 degrees, I planted the frame and watered it. Sprouts began to appear before the first week was up, and after a few weeks, our hot frame is full of healthy plants on their way to maturity.

Thursday, May 14, 2009

Workshops are off and rolling

By: Kate Betz, Manager of Public Programs
I am definitely a lucky lady. Sometimes—like when I can’t get my car out of my driveway because of snow or when the sun hasn’t made an appearance in weeks—I forget how beautiful our region is and how unique its opportunities are. Over the past month, I have had the opportunity to be a crash test dummy of sorts for a couple of our new hands-on craft workshops. I enjoyed them immensely! Not only did I get to soak up information that will help me both at work and in my home life, but I also got to see our interpreters doing what they do best—teaching the public. My first workshop experience was at our Heritage Vegetable Garden class in early April. We learned about historic vegetable growing, usage, and storing first, and then got to try our hands at building a hot frame. Hot frames are designed to give you a head start on spring planting. How? By using horse manure as a fuel to keep the inside of a wooden box warm enough so that seeds and plants can grow. Building the hot frame was definitely a workout for me and my fellow workshop participants, but it was incredibly satisfying. Make sure to check out Gwen Miner’s post about hot frames to learn more about the specifics and to see how our plants are doing in the completed frame. If jumping on a big pile of straw and manure wasn’t enough to get me excited about the opportunities on the farm, then I certainly got a taste of the hard work of farming in the second workshop I attended, our Farm Chores workshop. This workshop is designed to give visitors a taste of what getting the farm ready in the morning really means. I did everything from throwing hay bales from the loft, to letting out the animals (did you know the preferred language for steering sheep to pasture is “good day”?), mucking stalls, harnessing Zeb the horse, and cultivating a few rows in our hop field. I was tired and smelly by the end of the morning, but I had a truly wonderful time. If this has whet your appetite for getting your hands dirty in one of our workshops, make sure to check out the website for details on the season’s offerings.

Thursday, March 19, 2009

Pharmacy Preparations

By: Kajsa Sabatke, Interpretive Projects Coordinator
Patrick MacGregor, our Pharmacy Supervisor, is making indoor and outdoor preparations for the new season in Thrall’s Pharmacy. His most recent excitement was the arrival last week of his annual batch of leeches (stay tuned for a more in-depth post on the leeches). And now that the pharmacy garden has reappeared from under the snow banks, it is time to start prepping the garden for the growing season. The herbs in the pharmacy garden are almost all perennials, so Patrick won’t be planting much this year. He still has plenty of work to do, though! He’ll be raking the paths, resetting and repairing the brick edges, and labeling the herbs with signs around the garden. Patrick researched garden signs in the book Gardening for Ladies and Companion to the Flower Garden and used grant funding from the New York Council on the Humanities to create signs that look like they did in the 1840s.
left: From Gardening for Ladies and Companion to the Flower Garden, Mrs. Loudon, ed. Andrew Jackson Downing (New York: Wiley & Putnam, 1843).
Blog Widget by LinkWithin