Showing posts with label Harvests. Show all posts

Monday, August 6, 2012

What Did We Do Before Wonder Bread? - Part 2

By: Adrienna Maxwell, Farm Programs Intern

Back in the 1840s, New York State was one of the top producers of wheat in the country.

To first put things into perspective, it is helpful to look at wheat consumption on an individual level. The average family size at this time was six people. It is difficult to know exactly how much bread individuals consumed. In 1875, in calculating how much flour would need to be traded to Sweden, the U.S. Department of State calculated that a person required about .67 lbs of bread per day. Using that number, the average family of six in the 1840s would consume 4 lbs of bread daily, and 1460 lbs (or about 30 bushels) in a year! In 1845 the average acre in Otsego County (which includes Cooperstown, NY) produced 13 bushels of wheat. That means that families would have to grow just over 2.3 acres of wheat every year to feed just one family. That’s not even accounting for saving seed for the following year or selling seed to millers for profit! Thanks to Jenna Peterson, former Farm Programs Intern, for crunching these numbers.
We have a small demonstration plot of wheat behind the hop house here on the Lippitt Farmstead. It was planted by hand, and then furrowed in by our draft horse, Zeb, and the farmers. This plot is only about 1/18th of an acre, which means a family of six would need to grow over 41 times this amount of wheat!
So how did they harvest all this wheat and get it from field to table in the mid 19th century?

Farmers had about ten days at the end of the wheat growing season to harvest the grain before it would separate from the stalk and fall to the ground. They would use a scythe or a grain cradle to cut the stalks and then they would bundle the stalks together into sheaves to take to the barn, where the bundles would be spread out on the threshing floor. Up through the 1800s, threshing (the separation of wheat kernel from stalk and chaff) was done by using a flail to beat the stalks. This allows the grain to separate from the stalks. The winnowing basket would be used to toss the grain into the air, at which point the cross breeze coming through the correctly situated barn would blow the chaff away and leave the kernels. However, with this method some dirt and unwanted debris would still remain and have to be picked out by hand. Another option for threshing grain at this time was to have a team of oxen trample the stalks on the threshing floor, and then use the winnowing basket. Either way, it was hard, time-consuming work.

In this picture, the flail is on the left and the winnowing basket is on the right. These items are hanging in Brooks Barn at The Farmers’ Museum and are used for demonstrations, especially during Harvest Festival (which will be September 15th and 16th in 2012). 
The fanning mill was invented to replace the winnowing basket, sometime between the late 1700s and the early 1800s. This separated the grain from the chaff much more easily than it could be done by hand, and as technology progressed the fanning mill had more sieves added to it and became horse powered and such to make the process even faster.
A view of our fanning mill from the end where the grain and chaff is separated. The grain falls through and the chaff is blown away by the fan blades when the machine is being cranked. 
A full side view of our fanning mill, with a glimpse of the fan blades. This is also resting in Brooks Barn, so stop by and take a look! 
Most of the grain produced in this state in the 1840s was concentrated in the Genesee Valley, as mentioned in the previous post I wrote on this topic; it was then ground into flour in large mills in Rochester and shipped eastward along the Erie Canal, which had opened by 1825.

Wheat was a major product in New York State from the time of early settlement through the creation of the Erie Canal and westward crawling railroads. The Genesee Valley was once known as the “Granary of the Country” and Rochester as “Flour City”. So what happened? Why is wheat no longer a major crop of New York State?

As with the movement of most crops, it was a combination of factors. By the end of the 1700s, farmers were already battling a fungal disease called black stem-rust which was prevalent in any place that wheat had long been cultivated. By 1830 the Hessian fly and the midge fly had both wrought severe destruction on the eastern part of the state’s wheat crop, and production had all but ceased to exist in those regions until about a decade later, when the farmers finally figured out how to fight off these pests. And with the creation of the Erie Canal, it became much easier for farmers from the Midwest to grow wheat and ship flour east.

By the end of 1860, New York and Pennsylvania had fallen from the top production spots, and were replaced by Ohio, Indiana, Illinois and Wisconsin. The New York State growers held on for awhile because of New York City’s ever increasing demand for grains, but eventually almost all wheat production in the state came to an end. In 2009, New York State was 32nd in the country for wheat production, though there has been some recent movement to grow organic wheat in New York. If you are interested in learning more about that, I suggest plugging “Northeast Organic Wheat Project” into your Google search bar. You might just be surprised!

Tuesday, November 29, 2011

Pumpkins for All: Part 2

By: Marieanne Coursen, Agricultural Interpreter

In part one I showed the three varieties of pumpkins we grew this year at the Lippitt Farmstead. In addition to making a wonderful pie ingredient, pumpkin is also a great food for our farm animals. To make it easier for them to eat, it is first chopped into bite-sized pieces. 


I offered the freshly chopped pumpkins to several of our animals at Lippitt Farmstead and got mixed results. The pigs of course ate them, but then, they will eat anything!


The turkeys were skeptical...
...the geese gave it a try...
...but in the end they were not interested.


The chickens, however, loved it!


Ollie, our Southdown sheep, remembered eating pumpkin in the past and dug right in.

The rest of the sheep were not impressed, but I have been feeding them pumpkin sprinkled with grain for several days and now they eat it right up. Animals tend to be neophobic and often hesitate to try new foods, but once they sample it with no bad results they are happy to add it to the menu.


Last but not least, Seraphina is a huge fan of pumpkin.
Of course this is only appropriate since you may recall from an earlier blog post, her namesake was also fond of pumpkin!

Tuesday, November 22, 2011

Pumpkins for All: Part 1

By: Marieanne Coursen, Agricultural Interpreter

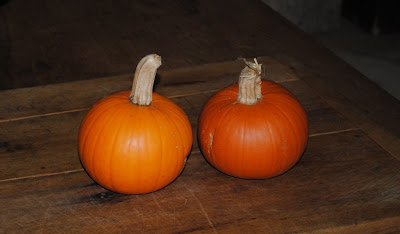
We grew three varieties of pumpkins on the Lippitt Farmstead this past summer. The New England Pie Pumpkin is an adorable small pumpkin, generally between five and eight pounds. This pumpkin is my personal favorite. 

It has a wonderful sweet flesh that is excellent for pies.


The Long Island Cheese Pumpkin is a larger, buff-colored pumpkin also excellent for pies. 
Although it has a pale outer skin, the flesh inside is a deep orange color. 


This pumpkin has a wonderful aroma when we cut it open. Shari, interpreter in the More House, made these beautiful pies with it, and I can attest that they were delicious!


This recipe is from The Frugal Housewife by Lydia Maria Francis Child, published in 1830.


These pumpkins will keep in a cool place for a few months but not necessarily until late winter or early spring, so some of the pumpkin is dehydrated for future use. One way to do that is to slice the flesh and hang the slices in the kitchen where they will dry from the warmth of the fire. Another way is to stew the pumpkin, then spread it on a pan and leave the pan in a warm oven until the pumpkin becomes leathery and can be lifted off the pan in one piece. Pat, our interpreter in the Lippitt Farmhouse, has been preparing much of our pumpkin this way.


The third pumpkin we grew was the Connecticut Field Pumpkin.
This is the type of pumpkin typically grown nowadays for Halloween. It is a large, nicely-shaped pumpkin, perfect for a jack-o-lantern. While it can be used for cooking, it is rather plain tasting and somewhat watery.

Its real claim to fame is as an animal feed. In part two of this blog post, I'll report the result of my farm animal survey regarding the eating of pumpkin.

Friday, August 12, 2011

Making Hay While the Sun Shines: Farm Life in August

By: Garet Livermore, Vice President for Education

Summer Farm Scene, Old New England Illustrated


One of the realities of farming is that it is outdoor work requiring the farmer to work in conditions as varied as the blizzards of January and the heat of summer.  This is especially true during the hot, sunny days of July and August when farmers need to go out into their fields make the hay that will feed their animals throughout the year.  Even, like in the illustration above, the farmers’ cows have the good sense to find a cool shaded section of stream to stand in, the farmer and his family must toil in the sun and heat to cut, dry and gather the hay to store in the barn for colder weather.  Haymaking was demanding work that required whole families and communities to work together to successfully bring in the crop.


Cutting Hay, Old New England Illustrated


Despite the perception amongst some that cutting hay is simply a large mowing job, haymaking is a very critical process that requires much planning and knowledge of the crop and local weather conditions to be successful.  The old adage “making hay while the sun shines” was a vital fact of life for 19th century farmers.  They needed to cut whole fields of hay with scythes and allow for drying time.  Scything was best done in a group so that whole rows could be evenly cut at a time. Neighboring farmers helped out and competed with one another as to both the speed and the quality of the cutting.  Jared Van Wagenen described a typical 19th century cutting party in Schoharie County:
“Always they laughed and gossiped and chaffed a little .  Then the man whose turn it was to lead struck three sharp taps on his stone with his scythe, a sound that was both a signal and a challenge, and they were off.  If someone lagged in his stroke, the fellow literally at his heels cried out the jocular warning: “Get out of my way or I’ll cut your legs off.”
 A talented man with a scythe was hard to find and a valuable addition to the haying crews.  It was said that the best men could cut an acre of hay a day by hand.  This was soon superseded by the horse drawn mowers of the 19th century that could easily cut 15 or more acres per day.


Bringing in the hay, by Charles Fredrick Zabriskie (1848-1914), Cyanotype photograph, PH 19634.  Fenimore Art Museum, Cooperstown, New York.


Cutting the hay was just the beginning of the process. The farmers then had to dry the hay before it could be put in the barn.  Hay needed to contain less than 22% moisture to avoid spoilage or, worse, causing a barn fire through spontaneous combustion. Drying was managed by raking the hay into long windrows and then periodically “tedding” or fluffing the hay with a rake or other device to completely dry the stalks in preparation for storing the hay in the barn.


Woman Driving Hay Rake, Unidentified photographer, ca. 1907-1915. F0014.2011(08). Plowline: Images of Rural New York.


In the 19th century, hay dried in the field then was brought in bulk on a haywagon to the barn for storage in the attic, or hayloft. This required forming a chain with many people moving the hay into the loft with pitch forks, a very labor intensive process in the heat. By the early 20th century new machinery had been invented that more efficiently compressed the hay into bales into the field which could then be stacked in the barn.


Gathering Hay for Storage, Pierstown, NY, by Charles Fredrick Zabriskie (1848-1914), black and white photograph, PH18830.  Fenimore Art Museum, Coopertown, New York. 


Midday meals brought out to the fields, called “dinner” in the rural Northeast until fairly recently, were a welcome respite from the hot, dusty work of haymaking.  Typically haymakers, wives, sisters and daughters brought hampers of cold meats, bread, cheese and pie to the fields and layed out blankets under nearby shade trees.  The favored drink of the season was switchel, a thirst quenching beverage made from cold well water, honey or maple syrup, apple cider vinegar and ground ginger. The taste of switchel has often been compared to a combination of lemonade and ginger-ale.  Here is a recipe to try on a hot day:

Switchel, or Haymaker’s Punch

1 cup Honey or Maple Syrup

1 cup Apple Cider Vinegar
1tablespoon ground ginger
2 quarts water
Mix together the evening previous store in the refrigerator and enjoy.
Chase hay Pressing, by Arthur J. Telfer (1859-1954), dry collodion negative, 5-07492.  Smith and Telfer Collection, Fenimore Art Museum, Cooperstown, New York. 

Hay Wagons on Main Street, by Arthur J. Telfer (1859-1954), dry collodion negative, C-508332.  Smith and Telfer Collection, Fenimore Art Museum, Cooperstown, New York.

Wednesday, March 2, 2011

We are getting ready!

By: Marieanne Coursen, Agricultural Interpreter

Jiggs and Buckwheat wait patiently while I unchain the pole we brought up from the drive shed. It will be the top of our nineteenth-century fire arch:

 
Cement block fire arch in progress:


Arches up, picnic tables in place, firewood stacked and covered:

Farmer Wayne tapping a maple tree on The Farmers’ Museum grounds along Route 80:

Farmer Wayne ready for me to ask Jiggs and Buckwheat to move the cart on to the next tree:

Sap dripping!

Barrels being filled daily with water to swell the wood so that they will hold the sap:

This Sunday starts Sugaring Off at The Farmers’ Museum!    I can’t wait to see all our old friends and meet lots of new folks, too.  As always, there is a great breakfast to be had in the Louis C. Jones Center in our main barn, our shops will be open, the schoolhouse will have fun activities, maple goodies will be baking in the More House oven, the blacksmiths will be banging their hammers, and of course we will be gathering and boiling sap and doling out jack wax.  Come dressed for mud and let’s talk maple!

Monday, February 28, 2011

Maple Sugaring During a Full Sap Moon

By: Christina Ely, Registrar, Plowline: Images of Rural New York

Maple sugaring, an agricultural endeavor localized to the Northeastern part of North America, goes back centuries. It is well known that the Colonists learned maple sugaring from the Native Americans who had boiled maple sap into syrup and sugar for so long that legends about how it came to be had been created. They also created two festivals celebrating maple sugaring, and had a “Sap Moon” also known as the “Maple Moon” or “Sugar Moon.”


Like ice harvesting, which I blogged about earlier this year, maple sugaring was an activity which farmers traditionally took part in each year. It was a sure sign that Spring was on its way to the Northeast. As the days became warm, but nights went below freezing the sugary sap would start to “run,” and farmers would race to gather the sap before the season’s abrupt end. The purpose of production has changed over time from the creation of a product of necessity (maple sugar) to a product of luxury (maple syrup). In the later part of the 1700s through much of the 1800s it was the production of maple sugar that was popular and useful, not maple syrup, which would spoil more quickly.


In the early, early days of production, people would use the “boxing” technique, cutting a diagonal or “V”-shaped gash in the sugar maple and then insert a reed or concave piece of bark with a wood trough or bucket beneath it to catch the dripping sap. This gave way to the use of wooden spiles around 1810, which were replaced by metal spiles invented during the Civil War. Metal buckets came some years later, with an introduction as late as 1875.


By 1850, boiling down sap moved into its own building. The “sugar shack” or “sugarhouse” began cropping up on farms and in sugarbushes across the Northeast.  


By 1959, metal buckets were beginning to be replaced by plastic tubing which proved to have greater efficiency as it could be directly connected to a large collecting tank in the sugarbush or to the sugar shack directly-saving a lot of time and labor.


In the late 1800s, boiling the sap became more efficient with the invention and manufacture of the evaporator.   The photo below shows the large and small evaporators at Yancy’s Sugarbush in Croghan, New York.  These evaporators were purchased in the 1920s by Andrew Yancey (2nd generation family owner) and are still in use at Yancey’s Sugarbush today.  They are fueled by wood cut from the Sugarbush


Along the way, some producers stopped using horses and sleigh to collect their sap from the sugarbush, and began to use a more modern means of collecting.  Even today, some producers insist that the use of a team of horses and sleigh or wagon is the best means for collection out in the sugarbush –  an example being the two teams of horses used at Yancey’s Sugarbush today.  A  romantic reminder for some, reminiscent of days gone by.
Join us during the “full sap moon” and celebrate the end of winter each Sunday in March for our annual Sugaring Off event from 9am – 2 pm and enjoy pancakes, maple syrup and traditional maple sugaring activities.
To view more images of maple sugaring from the early 1950s through the early 1970s visit Plowline: Images of Rural New York, one of our new collection websites.

Images from top to bottom:
Maple Sugaring in Lewis County, NY, 1950. Dante Tranquille. Photographic Negative. H 2.25” x W 2.25”, F0001.2010(069)j.
Maple Sugaring in Lewis County, NY, 1950. Dante Tranquille. Photographic Negative. H 2.25” x W 2.25”, F0001.2010(069)aa.
Maple Sugaring, ca. 1965. Dante Tranquille. Photographic Negative. 35mm, F0001.2010(134)nn.
Yancey’s Sugarbush, 1972. Dante Tranquille. Photographic Negative. 35mm, F0001.2010(127)d.
Maple Sugaring in Lewis County, NY, 1950. Dante Tranquille. Photographic Negative. H 2.25” x 2.25”, F0001.2010(069)c.

Tuesday, February 8, 2011

Ice Harvesting in our Backyard

By: Christina Ely, Registrar for Plowline: Images of Rural New York


Since first cataloging images of ice harvesting at Millers Mills last May, I have many times returned to the images for another look. For whatever reason, the photos captivated me – soon becoming some of my favorite images in the Dante Tranquille Collection on Plowline: Images of Rural New York.

 
The tradition of ice cutting and harvesting beckons back to the early 1800s, and a time when people began to find ways to keep meats, dairy and produce fresh for longer periods of time. Before that time, Americans often stored their perishable foodstuffs in deep wells, springs or storage cellars, or opted for salting or drying their meat. In the early part of the 19th century, ice houses began cropping up on family farms where ponds or lakes were present or nearby. Ice harvesting became a community affair taking place in “good ice-makin’ weather” during January and February, at which time the entire community would work to fill everyone’s ice houses in a matter of four to six weeks. Farmers gathered up their axes, saws, ice hooks, sleighs and teams of horses to join in the effort.

Ice harvesting is not an overly complicated process, requiring as few or as many different tools as desired. The harvester could use as few as three or four tools, however, over the course of time around sixty tools were invented to help in the process.

So, how complicated is ice harvesting? Here is an illustrated look at ice harvesting with photos from Millers Mills taken in 1958.
Snow was usually removed from the ice with a horse-drawn scraper.
A hole was then bored in the ice and the depth of the ice measured.  In early times, axes and saws were employed to cut through the scored ice-later giving way to markers and ice plows with teeth, each tooth progressively longer than the one before it that carved a straight line in the ice.  The ice was marked out like a grid, and then cut through with a four to five foot ice saw or was broken apart with a bar.
Hooks, tongs or a horse rigged to the block, were used to extract the block of ice from the water. 
Ice blocks were then slid across the ice and moved to a sleigh, wagon or other mode of transportation and taken to the ice house where they were unloaded using perhaps a tool or two, human muscle and a plank.
Would you like to try ice harvesting yourself? Then join in on a traditional ice harvest in Millers Mills located in West Winfield, New York on Sunday, February 13, 2011 starting at 11 am. This is a long standing tradition there, dating back so many years that no one actually knows when it even began as a community winter event. Traditional tools and methods are used right down to the team of horses and sleigh. Only one modern convenience is used and that is the gas powered machine used to score the ice the day before to the harvest. The harvest is a fundraiser sponsored by Grange #581. What do they do with the 300-500 blocks of ice? They store it in the ice house until the summer when they make ice cream for the town’s Ice Cream Social. A lot of work, but for a sweet reward!

To see more photos of the 1958 Ice Harvest in Millers Mills visit Plowline: Images of Rural New York.


Images above in order of appearance:
 Scraping.  Illustration from Scribner's Monthly, 1875
Ice Cutting. Millers Mills, 1958. Dante Tranquille. Plowline: Images of Rural New York, The Farmers’ Museum, Cooperstown, NY.F0001.2010(008)f.

Ice Harvesting, 1958. Dante Tranquille.  Plowline: Images of Rural New York, The Farmers’ Museum, Cooperstown, NY.  F0001.2010(103)a.
Ice Cutting. Millers Mills, 1958. Dante Tranquille. Plowline: Images of Rural New York, The Farmers’ Museum, Cooperstown, NY.  F0001.2010(008)b.
Ice Cutting. Millers Mills, 1958. Dante Tranquille. Plowline: Images of Rural New York, The Farmers’ Museum, Cooperstown, NY.  F0001.2010(008)g.


Tuesday, January 11, 2011

Mangel Wurzels

By: Marieanne Coursen, Agricultural Interpreter
This time of year our farm animals rely on feeds we have stored away for them. Horses, cows and sheep do occasionally paw through the snow to eat the grass underneath, but mostly they look to us for their sustenance. This usually means dry hay and grain, but in addition, the nineteenth century farmer often fed pumpkins, cabbage and root crops to the animals.

My favorite root crop grown for livestock is the mangel wurzel.
Mangel wurzels are a type of beet with a red or yellow root the shape of a large, fat carrot that sticks halfway out of the ground. The leaves can be fed fresh to the animals through the summer as long as they are not entirely removed until just before the roots are harvested. The roots are supposed to be able to grow as large as 2 to 3 feet long and 4 to 8 inches in diameter! The ones I have grown have never been more than about eighteen inches long and maybe five inches in diameter.

They are harvested in the fall and stored in an environment where they won’t dry out or freeze, either underground (in a simple hole or a root cellar) or in a protected heap on top of the ground, called a clamp. My mother told me that on the farm where she grew up in Germany, a small farm building had a cellar under it where all the root crops were stored, and she would have to go down and bring up baskets full to feed to the animals. In England it seems to be more common to store them in heaps above the ground.

The general rule is to wait until after Christmas to feed mangel wurzels. Apparently a change occurs in storage that makes the root less likely to cause scours (diarrhea). The watery, juicy nature of the root makes it very appealing to cows, sheep and horses, especially after eating dry hay for so long. We have a nifty chopper to break up the root and make it easier to eat.
Chickens enjoy them also and I like to hang one in their house for them to peck at:
I have tried storing the mangel wurzels two different ways. Here at the museum we dug a hole in the ground one fall and lined it with straw. We threw our mangel wurzels in and covered them with straw and dirt and a wood cover. In January, I dug them out and found they had kept very well. They were not frozen or rotten so this method was successful as far as quality went, but I did find it extremely inconvenient to get them out. This year I decided to try the “clamp” method. I was not completely confident it would work since it is colder here than in England but then again with global warming maybe it would be OK. This time it was at my home farm. In September I made a pile of my mangel wurzels on top of a bed of straw:
I also added rutabagas and turnips, and I covered the pile with straw and dirt. After heavy rains and colder than normal temperatures this fall, I thought my crop was doomed. Well, I am happy to say that I opened the end of my pile after Christmas and found the roots in good condition. The pile seemed to have a frozen skin on it of snow, dirt and straw that was not difficult to break through. I was able to get to the roots easily and close the clamp back up by putting the frozen clumps back over the hole. It seems to work like the “Ag-Bags” that farmers store silage in.
So far I have only found a couple of turnips that rotted and they were at the bottom. I have not gotten to the mangel wurzels yet since they are at the back of the pile, but I am optimistic that they will be fine.

Root crops have never been as popular in America as in Europe for a livestock feed. Most of the information to be found about root crops like mangel wurzels comes from England where they are unable to grow corn well. Nevertheless, root crops do make my life as a small farmer more interesting and satisfying, and hopefully the animals in my care enjoy the added variety to their diet.

Tuesday, November 9, 2010

Broom Corn Harvest

By: Marieanne Coursen, Agricultural Interpreter.
When I first started working at The Farmers’ Museum in 1997, I worked in the Westcott Shop making brooms. Now I work here as a farmer and have had the opportunity to grow and process broom corn. I find this very satisfying as I like to know how to do things from beginning to end; that is why I grow a garden, bake from scratch, knit with yarn I spun myself, etc. Makes me a little crazy, but happy!

This is our second year of growing broom corn at the Lippitt Farmstead. The plant is not really a corn at all, although it really looks like corn except for the fact that there are no ears. It is actually a type of sorghum. Other types of sorghum are grown as feed for cows: my son grows it to feed to his dairy cows, and another variety is grown in the south for sweet sorghum syrup and is even being studied for use in ethanol production. The variety that we grow for making brooms isn’t good for much of anything besides brooms. The brushes are harvested before the seeds fully mature so there is no grain value, and the plant itself is apparently not very tasty since it is the only crop we can grow here at the museum that does not get bothered by the deer! The seed is sown in rows in mid-May much like corn but closer together in the row and needs to be kept free of weeds. Our broom corn grew very well this year:


Harvesting broom corn is very labor intensive. As the brushes developed at the top we watched them carefully. When the brush emerges from the sheath it is time to “table” it.


To table the brushes, we fold down the stalks between knuckles so that the brushes can continue to harden and mature but won’t bend over from the weight of the developing seeds.
It also protects the brushes from the frosts that are possible at this time of year. I get the impression that all the broom corn was tabled at one time in large fields but since we only grew a small amount we checked daily and folded them down as we thought they were ready. Once it was all tabled, we waited a few more days and then cut the brushes.

I did this with a knife this year instead of pruning shears like last year because that is how it would have been harvested “back in the day.” It was fun but I was very aware of the location of my body parts in relation to the swing of the knife – this could be dangerous. As I went along I left small piles or “gavels” of cut brush between the rows to be picked up later.

Once the brushes were cut and gathered, the outer sheath – a leaf that surrounds the base of the brush and the peduncle (a fun word for the stalk that is attached to the brush) – had to be removed. This is easily done by peeling it off.

The next step was to remove the developing seeds. A book called Broom-corn and Brooms found in our NYSHA Library suggests using a curry comb to clean small lots of brush. This was a suggestion that escaped me last year when I left the brushes to cure with the seeds on and combed them later with a three toothed hatchel found in our broom shop. This worked OK but the curry comb used immediately after harvest worked much better!

Next, the brushes needed to be laid out to cure. Our hop house has the ideal space for this since it has a slatted floor in the second story for hops to dry.

In 1845 broom corn was a significant crop in New York State as there were several broom factories in need of brushes. At the same time, some farmers would just grow a small crop to satisfy their own needs for brooms. Years ago I a made the fancy brooms that are turned out in our broom shop here at the museum, but this winter I will try making a simple twine bound broom for use in our barns from part of our own homegrown broom corn. The rest I will deliver to our current broom maker, Joan Noonan, in the Westcott Shop. The brushes used there today to make the fine house brooms are imported from Mexico and much longer than the ones we grew. But Joan will probably be able to make a whisk broom or two that can be labeled “Grown and Made in Cooperstown, New York!”

So, now that I’ve both grown broomcorn and used it to make brooms, I can confidently say that if I had to, I could produce my own broom! Maybe next year I will grow flax and make a shirt – or maybe not.
Blog Widget by LinkWithin